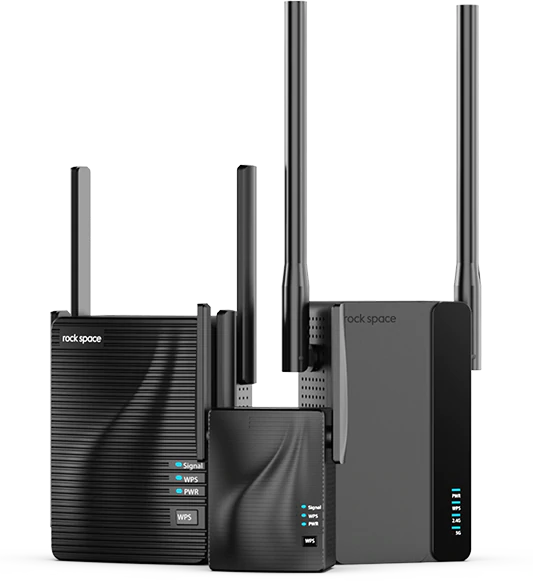
Rockspace Extender Setup -WiFi Settings

Rockspace Wifi Extender Setup Manual and WPS Configuration
In this article, we will focus on how you can easily setup your Wifi Rockspace WiFi extender. Ensure that you follow all the steps carefully to complete the process successfully.
Rockspace WiFi Extender Setup Without Ethernet (WPS) Method
Follow these steps to configure Rockspace wifi extender setup with WPS method
- Firstly, you need to plug the Rockspace extender into the power supply. Ensure that the router is in the same room as your extender.
- Now, wait until the Power LED turns into solid blue. Further, ensure that the antenna is upward and vertical towards the ground.
- Then, press the WPS button present on your router and wait for at least two minutes and press the button on the Rockspace Wi-Fi extender.
- Wait until the Signal LED present on the extender turns into solid blue. This means that the devices are connected to each other.
- Now, you can move your extender to the place of your choice and start using Wi-Fi.
Hence, by using the above steps you can setup Rockspace WiFi extender through Router without Ethernet Cable.
How to Setup Rockspace Wifi Extender With Ethernet Cable (Without WPS)
You need to follow these steps to configure the Rockspace WiFi Extender setup with ethernet cable.
- Connect your WI-Fi extender with the computer using an ethernet cable.
- Now, open any web browser and enter “http://192.168.0.254” or “re.rockspace.local” in the address bar to log into the extender’s web page.
- Enter your username and password (can be found on the sticker located at back side of the router).
- After successfully logging in, click on the “extender” option.
- Now, follow all the on-screen instructions.
- After doing so, click on the “save” option.
- When the Rockspace WiFi extender setup process gets completed, unplug your Rockspace extender and place it in your desired location.
- Finally, connect your device with the extender and start using WiFi.
How to log in to the Rockspace Extender?
Carefully follow the below-mentioned steps :
- Firstly, connect your desktop or mobile with the WiFi extender via WiFi. The name of the network will be “rockspace_EXT”.
- After connecting, open any web browser and enter “http://192.168.0.254” or “re.rockspace.local” in the URL address box.
- A login page will appear. Enter your credentials in the boxes and click on “Log in”.
- Now, you will be logged into the Rockspace extender’s page; you can tweak all the settings or customize them from here easily.
How to Update the Rockspace Wifi Extender's Firmware?
Go through the steps mentioned below :
- Login to the setup page of Rockspace extender.
- Click on the “Administration” option.
- Now select the “Firmware update” option.
- Then, locate the downloaded file of the latest firmware.
- Click on “Install”. The process will take up to 2-3 minutes, after which your firmware will be upgraded.
- The device will also reboot during this process. Therefore, don’t turn off your system in between and download the file only from the official website
Conclusion :
These were some of the easy to go through methods for Rockspace Wifi Extender Setup with and without WPS methods.. Hence, by following these instruction, you can easily configure your extender.
General Question's
This is possible due to the issue in the signal strength of your mobile device. Ensure you are near the extender and ensure that the encryption of another router is WEP.
Check the color in the LED to see the strength. If you can see a solid blue color, then it means that the strength is super strong (above -60dB).
If it shows a solid red or no color, it means that the signal strength is weak. Try moving the extender a little closer to router to get the speed.
Firstly, confirm whether the extension was successful. It can be checked by the indicator light and the management interface.
- Try connecting the device again.
- Relocate the extender to some new place.
- Reset the extender and check other Wi-Fi signals.
- See whether the router assigns the SSID.
- Still not connecting try to reset and again follow the process of Rockspace wifi extender setup
- Ensure that the mobile data is disabled and your device is connected to the Wi-Fi named “rockspace_EXT”.
- If you are trying to use it through a computer, make sure you are connected to the extender’s Wi-Fi network only. Check if your computer can obtain an IP address and DNS server automatically. Try resetting the extender and then try again.
Power on your device and as soon as the PWR LED is on, take a paper clip or any sharp thing and then press and hold the RESET button present on the back. You need to keep it pressed for 5-6 seconds.
Once you complete this process, the LED will turn into solid colour again. Hence, it means your extender has been reset successfully.